How to deflate airbed!! open the valve and let the air escape. Press down on the bed to speed up deflation.
Deflating an Air Bed Sleeper Sofa is a straightforward process that ensures your mattress is ready for storage or transport. The first step is to locate the valve, which is typically found on the side or at the end of the airbed. Once you open the valve, the air will start to escape naturally.
Pressing down on the airbed accelerates the process, helping you deflate it more quickly. Make sure the airbed is completely flat before folding it. This ensures that it can be stored compactly without taking up much space. Proper deflation also helps maintain the airbed’s integrity for future use, ensuring it remains in good condition.
Tools Needed
Deflating an airbed may seem simple, but having the right tools makes the process quicker and easier. Knowing what tools are needed ensures a smooth and hassle-free experience. Below, we discuss two essential tools you need to deflate your airbed efficiently.
Air Pump Or Deflator
An air pump or deflator is the primary tool for deflating your airbed. While you can manually deflate an airbed by pressing out the air, using a pump or deflator is much faster and more efficient. Here are some key points to consider:
- Electric Air Pumps: These are the most efficient. They quickly remove air from the bed. Ensure the pump has a deflate option.
- Manual Pumps: Hand or foot pumps can also work. They require more effort but are useful if you don’t have access to electricity.
- Built-in Deflators: Some airbeds come with built-in deflators. These are very convenient and usually easy to operate with a simple switch or button.
To deflate using a pump:
- Attach the pump to the airbed’s valve.
- Ensure the pump is set to the deflate mode.
- Turn on the pump and let it remove the air.
- Once deflated, fold the airbed to expel any remaining air.
Using an air pump or deflator saves time and energy, making the process smooth and efficient.
Valve Adapters
Another essential tool is the valve adapter. Airbeds come with different types of valves, and having the right adapter ensures a secure fit with your pump. Here are some common types:
| Valve Type | Description |
|---|---|
| Boston Valve | Large, two-way valve. Requires a specific adapter for a tight fit. |
| Pinch Valve | Smaller valve. Often found on pool floats. Requires a small nozzle adapter. |
| Screw Valve | Twist and lock mechanism. Needs a compatible adapter for a secure connection. |
Having a set of adapters ensures you can fit your pump into any airbed.
Here’s how to use them:
- Identify the type of valve on your airbed.
- Select the matching adapter from your set.
- Attach the adapter to your pump’s nozzle.
- Securely connect the adapter to the airbed’s valve.
- Proceed with the deflation process as described above.
Having the right valve adapters is crucial. It ensures the pump can be used effectively with any airbed, making deflation easy and fast.
Step-by-step Guide
Deflating an airbed can seem like a daunting task, but with a simple step-by-step guide, it becomes a breeze. Following these steps ensures your airbed is deflated properly, making storage easy and preventing damage. Let’s dive into the process.
Locate The Valve
The first step in deflating your airbed is to locate the valve. The valve is usually found on the side or at the end of the airbed. It is the point where you inflate and deflate the mattress. Here’s how to find it:
- Look along the edges of the airbed.
- Check under any flaps or covers that might hide the valve.
- If you have the manual, refer to it for the exact location.
Most airbeds have a one-way valve to prevent air from escaping while inflating. Ensure you identify whether your valve is a simple cap or a complex mechanism.
| Type of Valve | Location |
|---|---|
| Simple Cap | Edge or End of the Airbed |
| Complex Mechanism | Under a Flap or Cover |
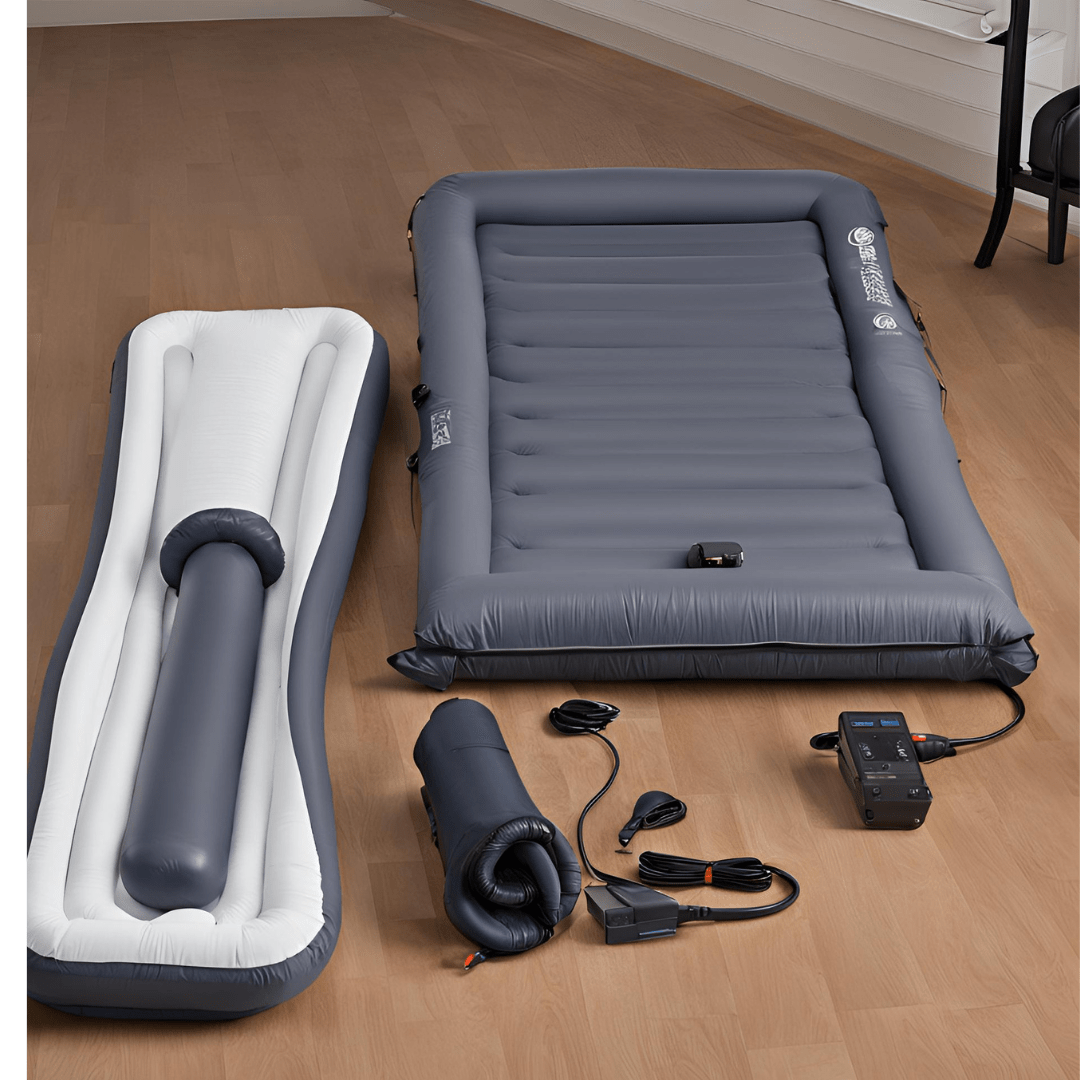
Attach The Pump Or Deflator
Once you’ve located the valve, the next step is to attach a pump or deflator. This device helps in removing the air efficiently. Follow these steps:
- Ensure the pump or deflator is compatible with your airbed valve.
- Insert the pump nozzle into the valve opening.
- If using an electric pump, plug it in and turn it on.
Using a deflator makes the process faster and ensures that most air is removed. If you don’t have a deflator, you can use a manual pump to push the air out.
Important: Make sure the connection is tight to prevent air from escaping around the nozzle.
Open The Valve And Begin Deflating
With the pump or deflator attached, it’s time to open the valve and begin deflating. Here’s how:
- Turn or twist the valve cap to open it.
- Activate the pump or deflator to start the process.
If you’re using a manual method, press down on the airbed to push the air out. For an electric deflator, let the machine do the work. Ensure that the air is flowing out smoothly and continuously.
Keep an eye on the airbed to avoid any folds or creases that might trap air inside.
Monitor And Adjust the Pressure
While deflating, it’s crucial to monitor and adjust the pressure. This ensures that the airbed is deflated evenly and thoroughly. Here’s what to do:
- Check the airbed periodically to see how much air is left.
- Adjust the pump settings if necessary to increase or decrease the deflation speed.
- Press down on different areas to ensure all air pockets are removed.
By monitoring the pressure, you can avoid overworking the pump and ensure that the airbed deflates properly.
Tip: Walk around the airbed while deflating to help push out any trapped air.
Remove The Pump And Seal The Valve
After the airbed is fully deflated, it’s time to remove the pump and seal the valve. Follow these steps:
- Turn off the pump or deflator.
- Carefully remove the nozzle from the valve.
- Quickly close the valve to prevent any air from getting back in.
Make sure the valve is securely closed to avoid any air re-entering the airbed. Double-check the seal if necessary.
Once sealed, fold and store your airbed in a dry place. This keeps it in good condition for future use.
By following these steps, deflating your airbed becomes a simple and efficient task.
Tips For Efficient Deflation
Deflating an airbed efficiently ensures its longevity and makes storage easier. Using the right techniques can save time and prevent damage. Here are some tips for efficient deflation that will help you manage your airbed with ease.
Deflate Slowly For Even Results
Deflating your airbed slowly ensures that the air escapes evenly. This helps prevent the material from stretching or tearing. Here are some steps to follow:
- Open the valve and let the air escape naturally. Avoid pressing down on the airbed too quickly.
- Gently press on different sections of the airbed to help the air flow out evenly.
- Use your hands to smooth out wrinkles as the air escapes. This helps maintain the shape of the airbed.
Rushing the process can cause uneven deflation, leading to problems with folding and storage.
Here’s a comparison table to show the difference between slow and fast deflation:
| Slow Deflation | Fast Deflation |
|---|---|
| Even air release | Uneven air release |
| Maintains airbed shape | Can cause stretching |
| Prevents damage | Risk of tears |
Use The Correct Adapter For Your Valve Type
Using the right adapter for your valve type is crucial for efficient deflation. Different airbeds come with different valve types, and using the wrong adapter can slow down the process. Here are some tips:
- Identify your valve type. Common types include Boston valves, pinch valves, and screw valves.
- Match your pump or deflation device with the correct adapter. Most pumps come with multiple adapters to fit various valve types.
- Secure the adapter to the valve before starting the deflation process. This ensures a tight fit and prevents air leaks.
Using the correct adapter not only speeds up the deflation process but also ensures that all the air is removed.
Here’s a quick guide to help you choose the right adapter:
- Boston Valve: Usually requires a two-way adapter. Ensure it fits snugly.
- Pinch Valve: Often needs a small, flat adapter. Make sure it fits inside the valve opening.
- Screw Valve: Typically needs a threaded adapter. Ensure it screws in tightly.
Using the right tools for the job can make deflating your airbed a breeze. Follow these tips to ensure a smooth and efficient deflation process every time.
Maintenance And Storage
Deflating your airbed properly is crucial for its longevity. After deflation, proper maintenance and storage ensure your airbed remains in top condition for the next use. Follow these simple steps to keep your airbed clean and store it correctly.
Cleaning The Airbed After Deflation
Once you’ve deflated your airbed, it’s essential to clean it thoroughly. Dust, dirt, and debris can damage the material over time. Here’s how to clean your airbed:
- Lay the airbed flat on a clean surface.
- Use a soft brush or cloth to remove any loose dirt or dust.
- Mix a mild soap solution with warm water. Avoid harsh chemicals.
- Dip a cloth in the soapy water and gently wipe down the surface of the airbed.
- Pay special attention to stains or sticky spots. Use a circular motion to clean these areas.
- Rinse the cloth with clean water and wipe off any soap residue from the airbed.
- Allow the airbed to air dry completely before storing it. This prevents mold and mildew.
| Cleaning Step | Details |
|---|---|
| Remove Loose Dirt | Use a soft brush or cloth |
| Clean Surface | Use mild soap and warm water |
| Spot Clean | Focus on stains or sticky areas |
| Rinse | Wipe off soap residue with clean water |
| Dry | Air dry completely |
Properly Storing The Airbed
Storing your airbed correctly prevents damage and ensures it remains usable for years.
Follow these steps to store your airbed properly:
- Fold the airbed carefully. Make sure there are no sharp folds that could cause creases.
- Avoid placing heavy objects on top of the airbed. This could create pressure points.
- Store the airbed in a cool, dry place. Avoid areas with extreme temperatures or humidity.
- If possible, use the original storage bag or box. This provides additional protection.
- Inspect the airbed regularly for any signs of damage or wear. Address issues promptly.
- Keep the airbed away from sharp objects. Even small punctures can render it useless.
By following these steps, you can ensure your airbed remains in excellent condition, ready for your next adventure.
Common Issues And Solutions
Deflating an airbed can sometimes be tricky. Many people face common issues that make the process frustrating. Here, we address two frequent problems and offer solutions to help you deflate your airbed smoothly.
Air Leakage During Deflation
Air leakage during deflation can be a nuisance. It often occurs due to small punctures or faulty valves. To tackle this issue, follow these steps:
- Check for Punctures: Inspect the airbed for small holes or tears. Use a patch kit to fix any damage.
- Ensure Proper Valve Closure: Before deflating, make sure the valve is fully closed. A loose valve can let air escape.
- Use the Right Deflation Method: Some airbeds come with a quick-release valve. Use it to deflate faster and minimize air leakage.
If you still experience leakage, try the following:
| Issue | Solution |
|---|---|
| Slow Leak | Apply soapy water to find the leak. Patch it immediately. |
| Faulty Valve | Replace the valve if it is damaged. Use a compatible valve kit. |
Difficulty Removing The Pump
Removing the pump can sometimes be challenging. This is especially true if the pump is integrated into the airbed.
Follow these steps for a hassle-free removal:
- Turn Off the Pump: Ensure the pump is turned off and unplugged to avoid any accidents.
- Release Built-Up Pressure: Open the valve to release any remaining air pressure. This makes it easier to remove the pump.
- Follow Manufacturer Instructions: Each airbed model is different. Refer to the user manual for specific removal instructions.
If you encounter any stubborn pumps, consider the following tips:
- Lubricate the Valve: A bit of silicone spray can help loosen a stuck pump.
- Use Gentle Force: Wiggle the pump gently instead of pulling hard. This prevents damage to the airbed.
By following these solutions, you can avoid common deflation issues and enjoy a smooth process.
Safety Precautions
Deflating an airbed seems simple, but safety precautions can make the process smoother and safer. Proper care ensures that your airbed stays in good condition for longer. Follow these precautions to avoid accidents and damage.
Avoid Over-deflating The Airbed
Over-deflating your airbed can cause unnecessary stress on the material. This can lead to wear and tear over time. Follow these tips to avoid over-deflation:
- Use a pump with a deflation feature: Some pumps have a built-in deflation mode. These pumps stop automatically when the airbed reaches a safe level of deflation.
- Monitor the deflation process: Keep an eye on the airbed as it deflates. Don’t leave it unattended.
- Stop the pump periodically: Turn off the pump every few minutes. This helps you check the progress and prevent over-deflation.
Below is a table showing recommended deflation levels for various airbeds:
| Airbed Type | Recommended Deflation Level |
|---|---|
| Single Airbed | 75% deflated |
| Double Airbed | 80% deflated |
| Queen Airbed | 85% deflated |
Check For Sharp Objects Before Deflation
Sharp objects can puncture your airbed during the deflation process. Always check the area for hazards.
Follow these steps:
- Inspect the surface: Look closely at the ground or floor where your airbed rests. Remove any sharp objects like rocks, pins, or nails.
- Use a protective layer: Place a blanket or tarp under your airbed. This adds a layer of protection.
- Keep pets away: Pets can have sharp claws that might puncture the airbed. Make sure they are not around during deflation.
Check the following areas for sharp objects:
- Under the airbed: Look under the airbed for hidden objects.
- Around the airbed: Clear the surrounding area of any items that could cause damage.
By following these steps, you protect your airbed from potential damage. This ensures it remains in good condition for future use.
Frequently Asked Questions
How to Deflate Airbed Quickly?
To deflate an airbed quickly, open the valve completely. Press down on the bed to release air. Use a pump with a deflate option if available.
Can You Deflate An Airbed Without A Pump?
Yes, you can deflate an airbed without a pump. Open the valve and press down to release air manually.
How Long Does It Take To Deflate An Airbed?
Deflating an airbed usually takes 5-10 minutes. The time depends on the size and method used.
What Should You Do After Deflating An Airbed?
After deflating, fold the airbed neatly. Store it in its carrying bag to protect it from damage.
Conclusion
Deflating an airbed is simple with the right steps. Make sure to follow the instructions and store it properly. Proper care ensures your airbed lasts longer. Keep these tips in mind for an easy deflation process. Enjoy a hassle-free experience every time you use your airbed.